HSD LVDS Automotive High Frequency Connectors Hsd Lvds Automotive High Frequency Connectors,Automotive High Frequency Connectors,12Pin Male Connecor For Cable,High Speed Connector For Cable Dongguan Zhuoyuexin Automotive Electronics Co.,Ltd , https://www.zyx-fakra.com
OpenCV3.3+VS2017 development environment to build
OpenCV 3.3 Official Release No. 3, launched in August, introduced significant performance improvements and new features. One of the major highlights was the official integration of the Deep Neural Network (DNN) module into the main repository, providing more robust support for deep learning tasks. The release also enabled C++11 support via the ENABLE_CXX11 macro, and included a wide range of optimizations such as SSE4.X and AVX/AVX2 instructions by default. Additionally, the built-in Intel IPP library was upgraded to version 2017.2, resulting in nearly a 15% performance boost according to official tests. If you're currently using OpenCV 3.x, upgrading is highly recommended for better performance and functionality.
Compiling OpenCV from source is relatively straightforward compared to older projects, especially with strong support for Visual Studio. However, for first-time users, the entire build process and configuration options might be confusing. While precompiled binaries are available, they may lack certain modules. Therefore, it's advisable to customize your build and include only the necessary components.
This guide assumes that you have CMake and Python (either 2.x or 3.x) already installed.
**First, prepare resources**
Download the OpenCV-3.3.0-vc14.exe file. It’s recommended to use SourceForge for faster and more reliable downloads, as it provides direct links without mirror issues. You can use third-party downloaders for even quicker access.
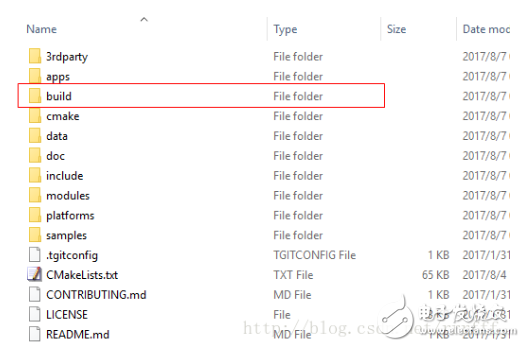
**Second, extract the source code**
Run the downloaded .exe file and choose a directory to extract the files. After extraction, you'll find a folder named "sources" containing all the OpenCV source code. The directory structure should look something like this:
**Third, generate the project**
Open CMake GUI, set the source directory, and click "Configure." Then select your IDE (e.g., Visual Studio 2017 WIN64) and click "Finish." Wait for the initial configuration to complete, which will generate the cvconfig.h file.
After configuration, you may see some red entries indicating missing dependencies. For example, messages like “A library with XXX API not found†or “Could NOT find XXX (missing XXX)†suggest that certain libraries need to be located or disabled. Adjust paths accordingly or disable unnecessary modules if they are not required.
Some tips to keep in mind:
- Since you're using OpenCV as a library, it's best to disable unnecessary builds like BUILD_DOCS, BUILD_EXAMPLES, and other test-related options.
- Enable C++11 support by checking the ENABLE_CXX11 option.
- For easier debugging and project setup, consider building the world library (BUILD_opencv_world), which combines all modules into a single .lib or .dll file. In release versions, you can selectively include only the modules you need to reduce the final size.
- If your project doesn’t involve video or audio processing, disable related modules like BUILD_opencv_video, BUILD_opencv_videoio, and WITH_GSTREAMER_XXX to streamline the build.